|
 Want to gain strength rapidly? Negative training is one of the absolute best ways to accomplish this quickly. But most negative training techniques require you have a partner to help you return the weight to the start position. How do you get around this? In this article, I'll show you exactly how to do it.
Negative training, also known as eccentric training, involves loading a weight movement in only the down or muscle-lengthening phase. For example, if you are doing a negative bench press, you would start with the weight in the top position (the weight would be more than you could lift on your own if you had to push it back up), lower that heavy weight under control to the bottom position of the exercise, then have a partner help you return the weight back to the top position.
How to do a negative rep:
The proper method and loading for performing a negative rep is not always well known. Each negative-accentuated rep should last somewhat longer than the negative phase of a regular movement. Depending on the range of motion of the exercise, this could be anywhere from 3 to 6 seconds.
The initial load used for negative training should be approximately 105% of your regular one rep max for the exercise, e.g. if you can bench 200 pounds, use 210 pounds for negative reps. You can increase this load if you are able to get more than 6 reps with that weight (6 reps is the most you should do with negative training - if you can do more reps, you aren't using enough weight for it to be maximally effective).
Normally, 3 sets of negative training per muscle group are plenty. These 3 sets will be all the work you will do for that muscle group that day. If you do more, you will be breaking your muscle down too much, making it difficult for your body to recover and build strength optimally. If you can do more sets and reps, you probably aren't working the negatives hard enough.
The real key to effective negative training is in how you lower the weight. Don't just lower the weight as you would in a typical rep. You must ACTIVELY FIGHT GRAVITY by pushing (or pulling, depending on the exercise) as hard as you can against the weight. If you don't fight the weight, your results will not be optimal. If you've done negative training before and didn't feel extremely sore the next day, you probably weren't fighting the weight. Try it and you'll feel the difference!
Here are 3 powerful techniques you can use to do effective negative training on your own. At the end of the article, there will be a link to pictures of these techniques in action.
1. Two Up/One Down Negatives
This type of training can be done with machines, barbells and even dumbells. Essentially, you use both of your limbs to move the weight to the starting position and use only one limb to lower it.
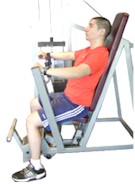
 The example that I like to use for the upper body is the machine bench press. Start by doing a brief warm-up to get the muscles ready. Set the weight to approximately half of your one rep max on the machine (you may want to start with less to get used to the concept first). Using both arms, press the weight to full lockout.
Now comes the tricky part. You must remove one of your hands from the handles and lower the weight with only one. The reason it's tricky is that suddenly your body is completely unbalanced. If you don't do something about it, the weight will twist your body around and drop down.
Here's how you get around that: you must quickly brace your non-working arm against the bar that leads to the handle. Press your forearm/wrist against that bar and exert a strong inward force. This will help to balance the body while still placing the majority of the tension on the working side.
Now lower the weight to the bottom, fighting it all the way down, as explained above. Use both arms to press the weight back to the top position then focus on working the other arm.
Go back and forth between arms with each rep using this technique for 3 to 5 reps on each arm. On the last set, after your last rep of negative training, do as many conventional reps as you can to really work the muscles.
This technique can also be applied to other exercises such as machine shoulder press, the leg press, cable rowing, close-grip pulldowns, etc. Use your imagination!
2. Unilateral Power Rack Stepping
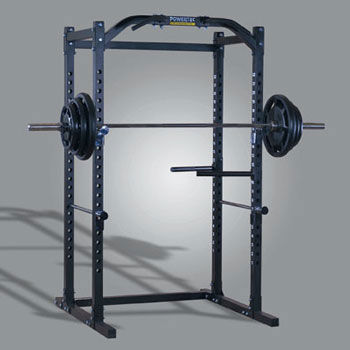
This technique requires use of the power rack to do safely. I will use the flat barbell bench press for this example.
 Start by setting a flat bench in the rack. Set the safety rails to a point a few inches above the bottom point of the rep (you're going to have to have enough room to slide yourself out from under the bar). Set the racking pins (the small hooks where the weight rests against the frame) above the safety rails. You will be unracking the weight from these pins. You will basically be setting up a bench press station inside the rack.
Load a bar with a moderate weight to practice before going up to the super-maximal weights. Lie down on the bench, unrack the bar and lower it down slowly (fighting it, of course) all the way to the safety rails. Be aware that when you reach a certain point in the rep (it coincides with your regular sticking point on the way up), your leverage will decrease and the weight will get a whole lot heavier. You'll understand when you experience this. That is why you MUST have the safety rails set properly.
After your lower the bar to the rails, roll the bar backwards towards the uprights so that it is over your face. This makes it easier to get out from under the bar and moves the bar closer to the racking pins.
Slide yourself out from underneath the bar, walk around to one end of the barbell and lift it back up onto the top racking pin. Be absolutely sure you have strong collars on the bar before you do this!! Walk around to the other end (the bar will now be tilted down) and lift that end up to the racking pin.
The weight is now back to the start position. Lie down and do another rep! Repeat this for 3 to 5 reps. This technique works best for the flat barbell bench press.
3. Standing Up On Something
This technique is the simplest of the three. Basically, all it requires is a bench or a box to stand on. I will use the chin-up as an example for this technique. This is actually the absolute best way to build yourself to doing full chin-ups if you are unable to do them with your bodyweight right now.
If you can already do chin-ups for multiple reps with your bodyweight, fear not! You can always set a dumbell between your feet for added resistance or use a hip belt to hang weight plates from your waist.
Start by setting the bench or box in front of a chin-up bar (a Smith machine bar also works well for this as you can adjust the height of it very easily)). If you are using the dumbell-between-feet method for added resistance, set the dumbell now. Stand up on the bench and grasp the bar with a close, palms-facing-you grip (also known as supinated). You should be in the top position of the chin-up.
Now step off the bench and lower yourself down as slowly as possible. You should be fighting to pull yourself up as gravity pulls you down. You will feel this one the next day! When you reach the bottom, step back up onto the bench and do another rep. Repeat this for 3 to 5 reps. This standing up technique can also be applied to dips with excellent results. Just set the bench in front of the dipping bars, stand up, lower yourself down then stand up on it again.
These three techniques are only the beginning of what is possible for negative training on your own. Use the techniques as a guideline and adapt them to other exercises that you use on a regular basis.
There is absolutely no reason a person training without a partner can't make use of the incredible power available with negative training. The results you get from these techniques will truly astonish you!

More Articles by Author Nick Nilsson
Return To Weight Lifting Articles Archive
|